
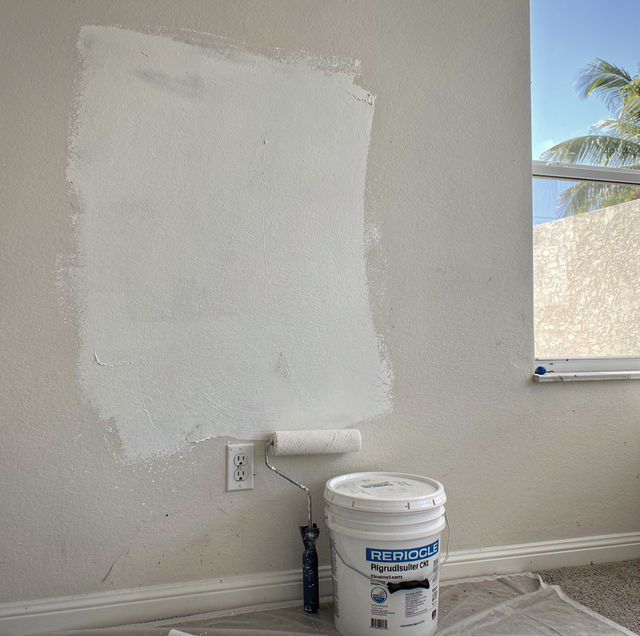
You fill a hole, sand it flush, roll on the same color from the same can, and the patch still shows: a slightly duller or shinier oval sitting right where the repair went in. The paint and the color are fine; what differs is how the patch and the wall around it affect the paint the moment it lands.
The Suction Difference Behind a Flashing Patch
A painted wall and a patch of fresh joint compound are not the same surface, even after they're both sanded smooth and covered in the same coat. The existing wall carries a cured paint film: dense, mostly sealed, and only lightly absorbent. The compound filling the hole is a soft, chalky material that draws moisture out of wet paint faster than the surrounding paint film does.
That pull is called suction, and it's what makes a patch flash: paint settles onto the old wall at a normal rate and dries with a certain sheen and depth of color, while the same paint gets pulled into the porous compound at a faster rate, drying thinner, flatter, and a shade lighter over the repair. The two areas received identical paint from the same can and still produced two visibly different results because the underlying surfaces pulled it in at different rates.
The effect gets more visible with sheen. On a flat wall, the difference can be subtle. On anything with more shine, the mismatch reads as a dull patch sitting inside a glossier field, because paint drawn into bare compound dries as a thinner, less reflective film than the paint around it.
Texture and Sheen Differences That Also Show Through
Absorption is only half of it. A patch also has a different surface texture from the surrounding wall, and that shows up in the light even when the color and sheen are close. A putty knife or a drywall knife leaves a dense, glass-smooth surface where it skims compound flat, while the surrounding wall carries a faint roller stipple or a light spray texture left over from the original finish coat.
Paint sitting on that smoother patch reflects light more evenly and in a slightly different direction than paint sitting on the surrounding stipple. Under a low-angle lamp or with daylight raking across the wall, that texture mismatch throws a visible outline around the patch, even on a wall where the color and sheen otherwise match closely. It's a separate problem from suction, and priming alone doesn't fix it; only matching the surrounding texture, with a light stipple roller or a texture spray dialed to the same pattern, closes that gap.
How Aged Paint Around the Patch Complicates the Match
The wall around a patch already carries months or years of exposure: light UV shift, a slight chalky buildup on the surface, dust ground into the film from normal cleaning. Fresh paint straight from the can, applied only to the patch, is starting from zero on all three of those.
That gap shows up as a difference in color and gloss that has nothing to do with porosity. A can of "the same" color, mixed to match a chip or an old label, still dries a shade brighter and glossier than paint that has aged on the wall and picked up a faint film of dust and UV exposure. On a wall with a strong color or a higher sheen, that age gap between old and new paint shows up as its own mismatch, separate from the porosity difference the compound itself causes.
Why a Second Topcoat Alone May Not Hide It
The instinct once a patch flashes is to roll on another coat, and sometimes that closes part of the gap, because the compound has already absorbed one layer of paint and has less appetite for the second. It does not close it all the way, and it can create a new problem: two coats over the patch and only one over the rest of the wall, which shifts sheen and thickness right at the repair's edge instead of fixing it.
Each coat seals the compound a little, but paint is not built to equalize porosity the way primer is, so extra coats can leave a patch fainter without making it disappear. The texture and aging mismatches described above don't respond to extra topcoats at all, since neither is about how much paint has soaked in.
Priming the Patch Before the Topcoat
A dedicated primer coat over the patch eliminates the suction difference rather than working around it. Primer is formulated to soak into porous material and dry into a tight, low-absorbency film, so once it's on the compound, the compound behaves like the sealed paint film around it rather than raw material. The topcoat that follows lands on two surfaces with matching absorption, rather than one thirsty and one sealed, so it dries to the same sheen and depth of color across the repair.
The patch gets the same porosity-sealing primer bare compound gets anywhere, confined to the repair and a feathered margin around it. Skipping straight to color and hoping a heavier coat compensates skips the step built to solve the problem.
Feathering the Patch so the Edge Disappears
Priming and matching paint solves the flashing on the patch itself, but a hard-edged patch still shows as a shape, because the compound has a defined boundary and the wall around it doesn't. Feathering solves that by tapering the compound out several inches past the repair, sanding it thinner and thinner until it blends into the surrounding surface with no measurable step. Each pass is left to dry before the next, and each is made with a wider knife than the last, which carries the taper farther out without adding thickness at the center.
A patch with a sharp perimeter makes the primer and paint change at a single line, and the eye finds that line as an outline once the color goes on. A feathered patch spreads over a wide enough area that no single point carries a visible edge, so the primer and paint change gradually rather than all at once, and the whole repair reads as part of the wall rather than a shape sitting on top of it.
Once the primer is dry, pass a flat palm lightly over the patch. Primer can raise a slight roughness on sanded compound, and a quick pass with fine sandpaper before the topcoat keeps it from reading as texture under the new color.
When a Patch Needs More Than a Spot Fix
Some patches resist every step above and still show. A wall lit by a window at a sharp angle, or a wall in a saturated or high-sheen color, can expose a patch that would be invisible on a flat ceiling in the same house, because raking light and reflective sheen both magnify the smallest remaining texture or absorption difference. In those spots, priming and feathering the repair correctly can still leave a faint mark that only a full repaint of that wall, corner to corner, resolves.
On a wall where that age gap matters, repainting the entire wall, corner to corner, yields a uniform result rather than a well-blended patch beside an older field of color.
Frequently Asked Questions
Not if it's filled with setting-type compound instead of standard joint compound. Setting-type compound hardens by chemical reaction in the time printed on the bag rather than by drying, so a deep fill can be sanded and primed the same day; a standard drying-type compound filled that deep cannot.
Yes. A nail-hole fill has little area for suction or texture to act on. A wide repair gives both room to show and, on a wall lit at a low angle, can call for priming the entire wall rather than spot-priming.
Some lightweight spackles are formulated so that paint can go straight over them, and the label says so and lists the conditions they cover. Outside those conditions, such as when painted with more sheen than the label allows, the patch gets primed like any other.
Wet paint reflects light almost uniformly, so a patch hides while the coat is wet. It shows as the film dries, and sheen keeps settling as the paint cures over the following weeks, which can sharpen a faint mark.
It does. Fresh plaster and setting compound are porous until sealed, and a lime-based plaster is also alkaline while it cures, so either flashes under paint like any bare patch, and a hand-troweled plaster surface has its own texture a knife-smoothed repair does not match.
Past the feathered edge, onto the old paint by a few inches, so the primer's own boundary isn't a line of its own. Stopping primer exactly at the patch leaves a thin unsealed ring that can flash on its own.
Book patch priming and feathering ahead of the next coat — the repair gets sealed and tapered into the wall before any color goes on. Vinicio Painting serves Hialeah Gardens, Miami Lakes, and Doral. Call (866) 444-1226.