
Smooth Cabinet Finish, No Brush Marks: 8 Steps That Work
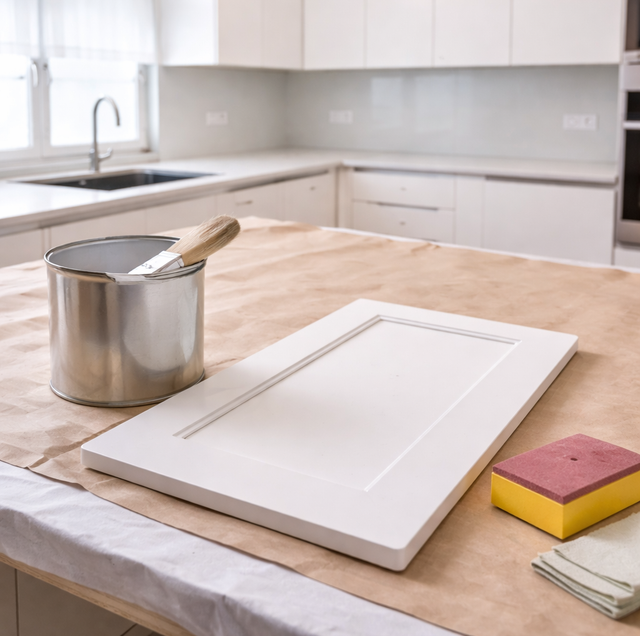
Quick Answer: A smooth cabinet finish comes from four things working together: thorough degreasing, sanding and de-glossing so the coating can grip, a bonding primer, and a hard self-leveling enamel applied in thin coats with the right tool. Skip any one of them and you get streaks, ridges, or a soft finish that chips at the first fingernail.
What Actually Makes a Cabinet Finish Look Smooth
A painted door that reads as factory-made has almost no visible texture. Light slides across it in one even sheet instead of catching on ridges. Wall paint on a cabinet, by contrast, dries with the fine stipple of a roller or the drag lines of a brush, and it stays slightly soft, so it dents and prints.
The difference is not talent with a brush. It is chemistry and sequence. Cabinet coatings look smooth when the surface underneath is clean and slightly abraded, when the primer bonds to a slick factory finish, and when the topcoat is a hard enamel formulated to flow out and level itself before it sets. Get those in order and the finish does much of the work for you.
Degreasing comes first, and it is the step people skip: Kitchen cabinets carry a thin film of cooking grease, hand oils, and cleaning-spray residue, heaviest around the range and the most-used doors. That film is the single biggest reason a fresh coat peels or fisheyes. Paint cannot grip oil. It sits on top, and weeks later a fingernail lifts it.
Wash every surface with a degreasing cleaner made for pre-paint prep, or a strong dish detergent solution, then rinse with clean water and let it dry fully. Pay extra attention to the area above the stove and the edges people touch most. This one step, done properly, prevents more finish failures than any product upgrade.
Sanding and de-glossing give the coating something to hold: Most existing cabinets have a slick, cured surface, whether it is old oil paint, a factory clear coat, or laminate. A new coating needs a bit of tooth to bite into. A light scuff-sand with a fine grit, around 220, knocks the sheen off and leaves microscopic scratches for the primer to key into.
For deep profiles, molded doors, or spots a sanding block cannot reach, a liquid de-glosser dulls the surface chemically. De-glossers and any chemical strippers are hazardous: read the label, wear the specified gloves and eye protection, and keep the room ventilated. After sanding, vacuum and wipe with a tack cloth so no dust rides into the primer.
The right primer bridges old surface and new enamel: Primer is what lets a hard topcoat stick to a slick door without months of babying it. A bonding primer, or a shellac or urethane-based product, grabs glossy and previously finished surfaces far better than a general wall primer. It also blocks tannin and old stains from bleeding through pale colors, and it sands back to a uniform base so the topcoat goes on evenly. On raw or repaired wood, primer seals the grain so the enamel does not sink in and look patchy.
A self-leveling enamel is what flows out flat: This is the choice that separates a cabinet finish from a wall finish. Standard wall paint is built to hide roller texture and stay flexible, not to harden into a smooth shell. For cabinets, you want an enamel that dries hard and levels itself: an alkyd or urethane enamel, or a modern waterborne enamel made specifically for trim, doors, and cabinets. These are formulated with a longer open time so brush and roller marks sag back into a flat plane before the coating sets, and they cure to a surface that resists knocks and cleaning.
De-glossers and chemical strippers are hazardous, so read the label, wear the specified gloves and eye protection, and keep the room ventilated. Spraying puts fine particles in the air, so a properly fitted respirator and real ventilation are not optional.
Choosing Between Spraying and Brush-and-Roll
Both routes can produce a smooth finish. The tool matters less than the prep and the coating, but it does change the workflow.
Spraying with an HVLP unit: An HVLP (high-volume, low-pressure) sprayer atomizes the enamel into a fine mist that lands as one continuous film with no tool marks at all. It gives the closest thing to a true factory look and is fastest across a large set of doors. The trade-offs are setup and containment: you have to mask thoroughly, spray in a dust-controlled space, thin the coating to the gun's spec, and manage overspray. Sprayed coatings put fine particles in the air, so a properly fitted respirator and real ventilation are not optional.
Brush-and-roll with a leveling additive: You do not need a sprayer for a smooth result. A fine microfiber or foam roller lays down a thin, even coat with almost no stipple, and a quality brush cuts in edges and profiles. The key is a paint-conditioning leveling additive mixed into the enamel. It extends the open time so the coating keeps flowing after the roller passes, and the fine texture melts out into a flat surface. Roll the flat panels, tip off lightly with the brush where needed, and keep a wet edge so laps do not show.
Think of the leveling additive as giving the wet paint a few extra seconds to relax, the way a poured liquid finds its own level if you do not rush it. That short delay is often the whole difference between a surface that reads smooth and one that shows every stroke.
Working Clean: Thin Coats, Labeling, and Dust
Thin coats beat thick ones every time: The instinct is to load the coating on to cover in one pass. Thick coats are exactly what causes runs, sags, and a rubbery surface that never fully hardens. Two or three thin coats, each sanded lightly with fine grit between passes and wiped clean, build a deeper and glassier finish than a single heavy one. Thin coats also dry evenly, so they level better and trap fewer bubbles.
Take the doors off and label everything: Remove doors and drawer fronts and finish them flat on a raised rack. A horizontal surface lets the enamel level under gravity instead of sagging down a vertical face, and you reach every edge. As you take each door off, label it and bag its hinges, screws, and pulls together, keyed to its opening. A door hung back on the wrong box often will not sit flush, and mismatched hinge screws strip out. Number the back of each door and the inside of its cabinet with tape, so reassembly is exact.
Control dust or it lands in the finish: A smooth coating is only as smooth as the air around it while it dries. Every airborne speck that settles into wet enamel becomes a bump you can feel. Vacuum the room, wipe surfaces, shut off forced-air blowing across the work, and let the space settle before you spray or roll. Give each coat a clean, still zone to cure in.
Remove doors and drawer fronts and finish them flat on a raised rack so the enamel levels under gravity instead of sagging down a vertical face. As you take each door off, label it and bag its hinges, screws, and pulls together keyed to its opening, since a door hung back on the wrong box often will not sit flush.
Why Cure Time Decides Whether the Finish Survives
Paint can feel dry to the touch in an hour and still be nowhere near hard. Drying is the solvent or water leaving. Curing is the coating cross-linking into its final tough state, and for cabinet enamels that can take days to a couple of weeks depending on the product, temperature, and humidity.
This is why rushing reassembly ruins good work. Stack a still-curing door against its frame, and the two faces can bond and tear when you open them, a defect called blocking. Hang doors too soon and bumpers, hinges, and fingernails leave dents in a surface that had not finished hardening. Let each coat cure per the label before recoating, and give the finished doors their full listed cure before daily use. Warmth and moving air speed curing along; damp, cool, still conditions slow it, so plan the timeline around the actual room, not the clock.
Seasonal conditions cut both ways here. Cold, damp air slows curing and keeps a finish soft longer, while hot, dry air can skin the surface before the coating underneath levels, trapping marks. Neither season is "the" time to paint cabinets; each just asks you to adjust open time, coats, and how long you wait before reinstalling.
Frequently Asked Questions
Usually no. If the existing finish is sound, well-adhered, and not peeling, degreasing, scuff-sanding, and a bonding primer let you coat right over it. Full stripping down to raw wood is only needed when the old finish is failing, heavily chipped, or so many layers deep that details are lost. Test adhesion first: press painter's tape firmly onto a primed test spot and pull it off fast. If primer lifts, your prep or the old layer is the problem, not the new coating.
Between topcoats, step up to a very fine grit, 320 to 400, used dry and with light pressure. You are not removing material, only knocking down dust nibs and giving the next coat a slight key. Coarser paper leaves scratches the thin topcoat cannot fill. A worn fine sanding sponge works well on molded profiles where a flat block cannot follow the curve.
A high-density foam roller works and leaves very little texture, but it can trap tiny air bubbles that pop and leave craters as the coating dries, especially with waterborne enamels. A short-nap microfiber roller usually releases the coating more cleanly with fewer bubbles. If you use foam, roll slowly and back-roll once to burst bubbles before they set.
Follow the recoat window on the can, which for many waterborne cabinet enamels is a few hours, but there is a trap: recoating inside the listed minimum on a still-soft first coat can drag and pull it up. If you missed the window and the coat has started to cure, wait the full cure or scuff-sand lightly before the next coat so it bonds rather than sitting loose on a slick layer.
Traditional oil and alkyd enamels can amber over the years, most visibly on whites and in low-light interiors like the inside of a closed cabinet. Waterborne enamels resist yellowing far better and hold a true white longer, which is why many people choose them for pale colors. If you want the hardness of an oil-based feel without the yellowing, a waterborne alkyd hybrid is the middle path.
Let it cure fully first, then slice the high edge of the run flat with a sharp blade or sand it level with fine grit wrapped on a hard block, feathering the edges into the surrounding area. Wipe clean, then recoat that panel with a thin pass so the repair blends. Trying to brush out a run while it is tacky almost always smears it wider and leaves a worse mark than the drip itself.
Book a cabinet refinishing estimate — get a hard, even finish that holds up to daily kitchen use. Vinicio Painting serves Hialeah Gardens, Miami Lakes, and Doral. Call (866) 444-1226.
