
How to Prep a Wall for Painting: The 7 Steps That Make Paint Last
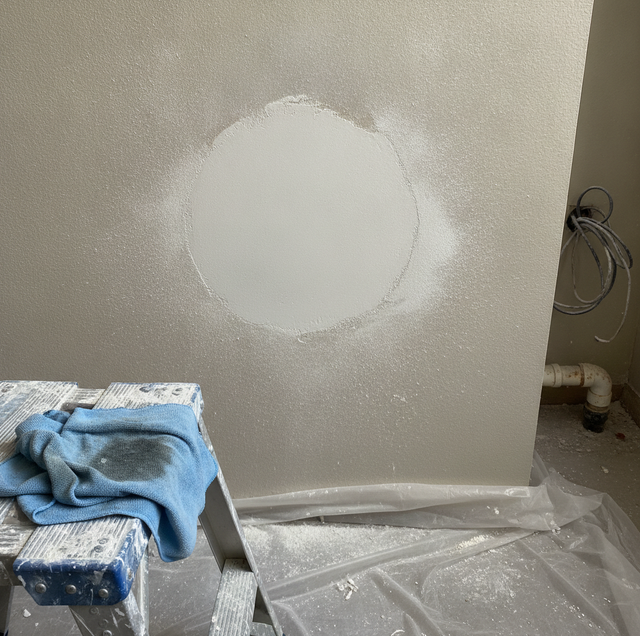
Roll fresh paint straight onto a dirty, glossy, or damaged wall, and it will let you down within a year. The color goes on fine. Then it starts to flake at the corners, or the old nail holes shadow through, or a stain bleeds up into the new coat. Almost every one of those failures traces back to the same place, and it is not the paint. It is the wall underneath it.
Prep is the unglamorous half of a paint job that decides whether the finish bonds, looks even, and lasts. Paint sticks to whatever it touches, no more and no less. If it touches a film of grease, it grips the grease. If it touches sanding dust, it grips the dust. Get the surface right, and cheap paint holds. Skip prep and the best paint on the shelf still fails.
Why Prep Decides Whether Paint Lasts
The mechanism is simple once you see it. Paint cures into a thin, flexible film, and that film is only ever as attached to the wall as the layer directly beneath it. A clean, sound, lightly textured surface gives the film thousands of tiny points to lock onto. A slick or contaminated surface gives it almost nothing, so the film sits on top like a sticker waiting to peel.
Three different problems need three different fixes, and mixing them up is where a lot of home jobs go wrong:
- Cleaning solves adhesion. It removes the invisible film of dust, grease, and oils that would keep paint from gripping.
- Repair solves smoothness. It fills the damage that new paint would otherwise highlight instead of hide.
- Priming solves sealing and bonding. It locks down porous or repaired spots and blocks stains from bleeding through.
Cleaning is not repair, and repair is not priming. You need all three in the right sequence, because each step sets up the one after it.
The Seven Steps, In Order
The order matters as much as the steps themselves. Working out of sequence usually means undoing work you already did.
1. Clean the Wall
Start by washing off dust, grease, and grime. In a kitchen, that means cutting the cooking oil film with a degreaser or a TSP-substitute cleaner, then rinsing. Hallways and stairwells collect hand oils around switches and door frames. Bathrooms collect soap and body oils.
In damp or humid rooms and on exteriors, check for mold or mildew first. If you find any, kill and remove them before you do anything else. Painting over living mold does not stop it, and it will grow back up through the fresh coat. That step carries extra weight in a wet climate, though a leaky bathroom in a dry one has the same problem, so treat it as a condition of the wall rather than a season.
2. Repair the Damage
Fill nail holes, dents, and cracks with spackle for small defects or joint compound for larger patches. Where trim meets the wall and gaps have opened, run a bead of paintable caulk. This is the step that decides whether the finished wall reads as flat and continuous or as a map of every ding it ever took.
3. Sand Smooth and Scuff the Gloss
Once patches are dry, sand them flush with the surrounding wall. Then scuff-sand any glossy or slick areas, old enamel trim, or a previously high-gloss wall, so the shine is dulled to a haze. Sanding does two jobs: it levels repairs, and it gives the whole surface a fine "tooth," a microscopic roughness the new paint can physically key into. A glossy wall left alone gives paint nothing to hold, which is exactly where peeling starts.
4. Deal With Loose and Peeling Paint
If old paint is lifting, scrape back everything that is loose until you reach paint that is stuck tight. Then feather the edges: sand the transition so the border between the bare spot and the old paint tapers smoothly rather than leaving a ridge. A hard edge will telegraph through the new finish; a feathered one disappears.
5. Remove Every Bit of Dust
All that sanding leaves a fine powder, and paint will happily bond to dust instead of the wall, then peel away, carrying the dust with it. Wipe the whole surface down with a tack cloth or a damp cloth and let it dry. This step takes minutes and quietly saves the whole job.
6. Protect Everything You Are Not Painting
Tape off trim, mask window edges, lay drop cloths, and either remove or cover switch plates, sconces, and hardware. Protection does not change how the paint bonds, but it is the difference between a crisp line and an afternoon of cleanup, so it belongs in the sequence before a drop of paint moves.
7. Prime Where the Wall Needs It
Not every wall needs primer, but several situations do: bare drywall, fresh patches, water or smoke stains, glossy surfaces, and big color changes (especially going light over dark). Primer seals porous and repaired areas so they do not drink up the finish coat unevenly and flash a different sheen. A stain-blocking primer does an extra job: it caps water rings, smoke, and wood tannins so they cannot bleed up into the new color. Priming comes near the end because it seals the clean, repaired, sanded, dust-free wall you just built, not the mess you started with.
One Way to See the Whole Thing
Prepping a wall is a lot like prepping a nail before a manicure. Nobody paints polish straight over an oily, ridged nail and expects it to last; they clean it, file the surface smooth, buff off the shine, and wipe away the dust so the polish has something to grab. Do that, and the color holds for weeks. Skip it, and it chips by the weekend. A wall is the same surface at a larger scale: clean it, smooth it, dull the shine, clear the dust, seal it, and only then add color.
A Note on Older Homes and Safety
Two safety points are worth stating plainly. If the house was built before 1978, the existing paint may contain lead. Do not dry-sand or scrape it in a way that spreads dust; have the paint tested, or bring in a pro trained to handle it safely. And whenever you clean with a degreaser, strip old coatings, or prime, keep the room ventilated and follow the product directions. Prep involves the harshest chemicals in the whole job, so treat that stage with the most care.
Good prep is invisible when it works. Nobody looks at a wall and admires the sanding. They just see a smooth, even, durable finish and assume the paint was good. It usually was. What made it last was everything that happened before the color went on.
Frequently Asked Questions
Yes, and it is the step most people are tempted to skip. Paint bonds to the surface it actually touches, and walls carry an unseen film you cannot always see: dust, cooking grease in kitchens, and hand oils around switches and door frames. Paint that lands on that film grips the film, not the wall, and lets go later. One detail the wash itself hides: any leftover TSP or degreaser has to be rinsed off, because a chalky residue left sitting on the wall blocks adhesion just like the grease did, so the rinse matters as much as the scrub.
Clean first, then repair holes and cracks, then sand smooth, then remove the dust, then prime the bare or patched spots. The order is not arbitrary; each step sets up the next. Sand a dirty wall, and you just grind the grime deeper into the surface. Prime over leftover dust, and you seal the dust in place instead of sealing the wall. One timing catch inside the repair step: paintable caulk needs to cure, often a few hours to overnight, before you prime or paint over it, or the fresh paint can crack along a joint that was still shrinking.
A glossy or slick surface gives new paint nothing to hold onto, so it can peel off in sheets down the line. Scuff-sanding dulls the shine and creates a microscopic tooth, a light roughness the new paint can physically key into. Aim for roughly 150 to 220 grit; you are not trying to sand the gloss off completely, just to break the sheen. On trim and detailed surfaces where sanding is awkward, a liquid deglosser is a no-sand alternative that etches the sheen chemically instead. Either way, that single step is often what separates paint that stays put from paint that lifts.
It comes back, right through your fresh paint. Painting over mold or mildew does not kill it; the growth is still alive under the coat and works its way back to the surface, often within weeks, leaving stains and lifting the film. The actual fix has three parts: kill the growth with a mildewcide or cleaning solution, physically remove it, then correct the moisture source feeding it, a leak or poor ventilation. Skip that last part, and the mold feeds right back through the new paint, no matter how well you cleaned.
Yes, because paint does not hide surface damage, it highlights it. Under raking light, the kind that skims across a wall from a window or a lamp, every unfilled nail hole, dent, and hairline crack throws a small shadow that the eye catches. Fill them with spackle or joint compound, sand the patch flush, and spot-prime it so the repair does not flash a slightly different sheen than the wall around it.
Bare drywall, fresh patches, stains, glossy surfaces, and big color changes all call for primer. Primer seals porous or repaired areas so they do not drink up the finish coat unevenly and leave blotches, and a stain-blocking primer caps water rings, smoke, and wood tannins that would otherwise bleed up through the new color. If a wall is already painted, sound, and you are staying in the same color family, a good paint over clean prep can skip the separate primer coat.
Book a free painting estimate — get a finish that was prepped to last, not just painted over. Vinicio Painting serves Hialeah Gardens, Miami Lakes, and Doral. Call (866) 444-1226.
